Ways to Export PST from Office 365 Online

MS Office 365 is the most popular and commonly used cloud-based emailing services across the world. But there are many cases of hacking increasing due to which users hesitates in keeping their data on Cloud. Therefore, they need to preserve a local copy of essential data stored on Cloud i.e. Office 365. However, saving Exchange Online mailbox data on local machine will help in overcoming any kind of disaster. A user can keep their data safe by exporting PST files from Office 365 with contacts and calendar. Microsoft also offers few methods for the same because there are many users who put up the query on how to export Office 365 mailbox to PST. Thus, to solve the query, different ways are discussed in the blog to export PST from Exchange Online mailbox.
Recommended Solutions to Export Office 365 Exchange Online Mailboxes to PST
If a user is searching a way of how to export PST file from OWA, then there are two ways available that can be used for required process:
- Opt eDiscovery Export Tool to Export O365 Emails
- CubexSoft Office 365 Backup Tool
Method 1. Export PST from Office 365 using eDiscovery PST Export Tool
If a user needs to export OWA (Outlook Web App) account folder to PST, then it can be done with eDiscovery PST Export Tool. To understand properly, follow the steps:
Step 1. Go to protection.office.com and enter details of O365 account >> Click on the square shaped icon appearing on top left of screenshot and click on Admin.

Step 2. Extend Admin Center and choose Security & Compliance option.

Note : Before you continue further, make sure that your account is a eDiscovery Role Group member. And if it is not, then add the role to your account. For this, click on permissions displaying under Security and Compliance. Choose eDiscovery Manager >> from the right panel, Click Edit Role Group and add account to eDiscovery Administrator list and click Save button.

Step 3. Go to Search & Investigation center >> Click Content Search and hit “+” icon to create eDiscovery case.

Step 4. Enter the desired name that you want to search in Name field. Choose required options and press Next.

Step 5. Select Add Condition option in order to add filters to search and click Search option.

Step 6. Once the search process completes, click on Start Export button.

Step 7. Next window will appear, select options as per need and click Start Export.

Step 8. After Export process is finished, click on Downloaded exported results appearing under Export Results to a computer.

Step 9. From another window, click on Copy to Clipboard and copy the key and press Download results.

Step 10. In eDiscovery Export Tool, paste the copied key. Click on Browse, select location and click Start to download O365 mailbox backup into PST.

Method 2. Export PST from Office 365 using Office 365 Backup Tool
The above manual processes are quite complicated to execute. So, if a user is from non-technical field then it would be difficult to backup Office 365 mailbox into PST manually. Therefore, experts has designed an easy way i.e. Office 365 Backup Tool. It can be accessed by a user for instant export of PST file from Office 365 account. By utilizing the application, users can generate the complete backup of O365 Exchange Online account to PST.
Further, we have discussed two methods for both (Single User and Multiple Users) to export PST files from Exchange Online account.
Working Steps for Single User
Step 1. Install and open the application on the system. Login by entering the desired credentials of Office 365.

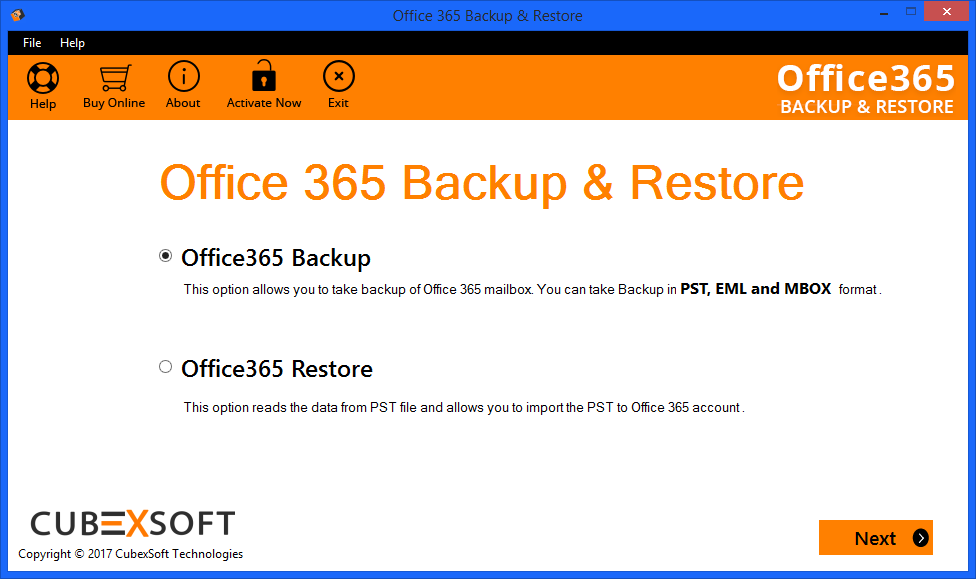
Step 2. A window will be displayed, choose Office 365 Backup option and click Next.

Step 3. Now you will see the list of folders is appearing, select the desired items that you required to backup and archive. Click Browse, choose saving path where you want to keep the local copy of archive OWA emails and press Next.

Step 4. Choose PST option for exporting mailboxes of Exchange Online account into PST format. Also select the desired preferences and click Next.

Step 5. Now, preview the on-going backup status which will show the current folder and overall progress bar.

Step 6. After process gets complete, software will display the message “Backup process is completed”.

Working Steps for Multiple Users
Step 1. At first, retrieve all user account login details of Office 365 in CSV file. It is important because if you don’t have none, then you will face difficult in the backup process. Know how to access CSV from Office 365 admin account.
Step 2. Download and run the application on the system and enter the desired O365 Exchange admin account details. Select the Account Impersonation and click Login button.

Step 3. Select “Office 365 Backup” and hit Next.
Step 4. Click on Browse and load the earlier generated CSV file.

Step 5. After loading CSV file, you will see that software has displayed the complete mailbox list. Choose Select all Users to get the backup of all mailboxes at once or you can also select the required check box and perform the process. Now, select destination location by clicking the Browse button where you need to save the backup and press Next.

Step 6. Choose the PST as a saving option. Also, ensure that Outlook of any Unicode edition is installed on the system. With this, select the options as per requirements and click Next.

Step 7. Get the Live Preview of export process which shows current folder status and overall progress.

Step 8. Once the process finished, software will display a dialogue box of
“Backup process is completed”. Click OK to finish the process.

Summary:
The write-up has discussed ways using which you can retrieve Office 365 mailbox data on local machine by exporting the same into PST format or any other extension which you find suitable. In the first method, we have discussed the process by applying eDiscovery Export Tool and in the second process we have discussed an expertise recommended solution that can be used easily by even a non-technical user.
