How to Import OLM File to Office 365- Get the Instant Solution!

Are you finding a way out to import OLM file to Office 365? If yes, then the complete section is here to help you out! The following segment has discuss an appropriate technique that will help you in performing the desired process accurately without facing any challenges.
Get quick and effortless OLM to Office 365 Tool to batch import OLM emails, contacts and calendar to Office 365 environment directly. Download the trial edition of the tool and check the software working by importing first 25 files from each OLM folder free of cost.


Among all Microsoft Office applications, MS Outlook is one of the most commonly used email applications, mainly in a professional environment. It is presented for both Windows operating system and Mac operating systems; the only difference between is supported file format for data storage. On Windows Outlook support the PST file format and Mac machines use Outlook 2011, which supports OLM file format for data storage.
The trend to change from desktop-based applications to online applications is on top. Today, users do not only use the cloud as a backup but also use the online application that offers a cloud-based interface to work and storage. Microsoft has launched Office 365, which is a web-based application and offered multiple software on its subscription. This application supports the complete usage of MS Office applications available for Windows and Mac operators.
In the situation you are a Mac operator, moving to Windows and needed to import OLM file to Office 365 manually without using Mac OS, then you necessity to migrate your OLM to PST format first, like Microsoft Outlook for Windows does not support .olm data files. After the successful migration, then you can import your converted PST file into office 365.
Introduction to MS Outlook and Office 365
Microsoft Outlook- A perfect and common used email client application. The main feature of MS Outlook is easy and simple approach to both home users and professional users by providing a simple user interface. MS Outlook has developed for both Windows as well as Mac OS X.
Office 365- It is a cloud-based email client application. With the time, Outlook is accessible for cloud based because of its rich openness whenever from anyplace. Outlook 2016 is an integrated part of office 365 and hence has access to most of the Office purpose applications. Outlook Web Access or OWA is the only application which you can use on adaptable platforms whether it is Windows or Mac PC, Windows Phone, Android, Tablets and so on.
Let us start further by discussing the solutions for importing OLM file to Office 365 account. The first section will discuss the procedure explained using third party solution and the second part will highlight the manual process steps. You can use the suitable solution and perform the same.
How to Import OLM File to Office 365 using Third Party Tool
To import OLM file to Office 365, you can take help of direct OLM to Office 365 Tool. A reliable and cost-effective utility that directly migrate OLM emails, contacts and calendar to Office 365 environment. The application designed with user-friendly interface so that all users and IT admins can access it instantly and smoothly performs the migration without data loss. Apart from Office 365, there are 30+ other saving options which you can use to import OLM file such as Outlook PST, PDF, MSG, EML, MBOX, MHT, HTML, RTF, DOC, IMAP, Exchange Server, Gmail, G Suite etc. Moreover, the software is capable to export corrupt OLM files as the tool equipped with the option of Use Extracted Mode for Corrupt OLM files. It repairs the damaged file and enables to restore its data into other accessible file format. Now, let us proceed further by knowing the working steps of the tool that will help to import OLM file to Office 365.
Easy and Quick Steps to Import OLM File to Office 365
Follow the procedural steps and batch import OLM files to Office 365 account:
Step 1. Download, launch and open OLM to Office 365 Tool on Windows OS.

Step 2. Click Select Files/Select Folder button to add OLM files or folder and click Next.

Note: Select option of Use Extracted Mode for corrupt OLM files, in case you want to import corrupt OLM files to Office 365.
Step 3. Software start listing OLM folders on the next screen. Each folder will appear with a checkbox that will help to carry out selective migration. Click Next.

Step 4. Click Select Saving Option drop-down menu and choose Office 365. Set other Office 365 options as per need – Folder Types, I am Admin (for batch migration), Change Language and Copy to Default Folders. Lastly, click on Connect button to proceed

Step 6. Software will now immediately start the process and completes with a message “Process Completed Successfully”.
Advantages of using Third Party Tool
- Batch import OLM files to Office 365 account at once.
- Enables to export OLM emails, contacts and calendar to Office 365.
- Ability to migrate corrupt OLM files into Office 365 environment.
- Keeps data integrity and folder structure safe throughout the process.
- Allows to export large-size OLM files without data loss.
- Advance Change Language option to perform the process in desired language.
- Copy to Default Folders to import OLM files to existing folders of Office 365 account.
- I am Admin option to import all user accounts into Office 365 at once.
- Benefit of Folder types in case you want to export only OLM contacts or calendar.
- Dual Options i.e. Select Files and Select Folders to add desired OLM files or folder.
- Easy to run and use on Windows 10, 8.1, 8, 7, XP, Vista etc.
How to Import OLM File to Office 365 Manually?
To export OLM files to Outlook Web App, there is no direct method to import OLM file to Office 365, first you necessity to convert their data files into an OLM to PST format or Office 365 to run them on Windows-based machine. To implement this procedure, first you need to set up an IMAP email account, then you can use it to move Mac Outlook emails (OLM file data) to Windows Outlook (PST).
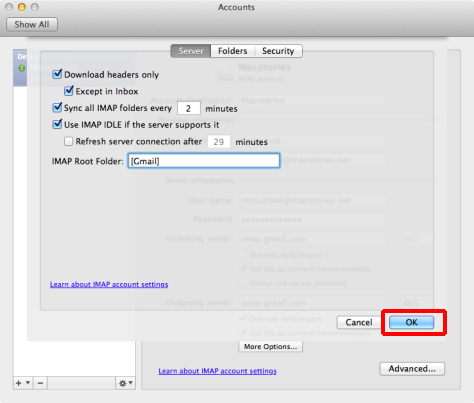
Step 1. Open your Gmail Account to set up an IMAP Email Account

Step 2. Then, configure OLM file with Gmail Account

Step 3. After this, create a new Gmail Label, and beginning synchronizing the Mac OLM file with the IMAP mail account
Step 4. Now, transfer all the data items from OLM file to IMAP mailbox
Step 5. Then, you can transfer those emails from IMAP mailbox to MS Outlook

Step 6. Now, finally complete OLM file emails in MS Outlook
Steps to Import Outlook PST file to Office 365
You can perform this process by Microsoft PST Capture Tool. This tool helps you to capture the PST file to convert saved data. For this solution, you need to create a PST search to navigate the necessary PST files on a specific on your network and then you can easily import unlimited PST files to particular mailboxes in your association.
- First, properly download and install the PST Capture Tool in your machine
Note 1: Download the PST Capture tool you necessity to add the service account to the Local Administrators group on the server you are installing on.
Note 2. And you also necessity to manually install the PST Capture Agent on all machines, which you want to scan for PSTs. So, install PST Capture Agent on your system where your PST file is saved, to complete the procedure.
- After a successful install, again launch the tool
- On the screen, you will be see two options “New PST Search” and “New Import List”
- Choose the “New PST Search” option and select one client computer in your domain
- Then, in the next screen, you will be see the default options select accordingly
- The next window will provide you to run “manually or schedule” the scan, select one and press the next and then finish
- After that, now go back to the PST Capture Tool Console, and check your machine name and selected the “Search All Now Button”
- After successful scan, choose the server and the PST file, which was found and press the New Import List and choose Cloud Import and went to the new tab created ‘Cloud Import List’
- Now enter the details of your Office 365 account to start a cloud connection
- Check and verify all the settings options
- Configure Message Import option according to you
- Choose Archive Mailbox option settings from the presented list, this permits you to directly import the PST file to Online Archive mailbox attached to primary mailbox
- Select the items to be imported in NON mail item settings
- In Staging area Settings, you will be view the location of the PST file and size
- Import tolerance settings permit you to set the time to stop the conversion if too many data items fail
- After this, set the General Settings and press the OK button
- Now, you will able to see the main screen, here to select Set mailbox option, a window will open and display the presented mailboxes to convert the contents of the PST, then choose a mailbox
- On the main screen you will be able to view the PST file of selected mailbox
- Then, click on “Import All Now” button
- If you want to stop this procedure, so you can also stop this process by choosing “Stop Import” option
- Finally, login to your Office 365 and launched Outlook (OWA) and you will be able to view the loaded PST file on the screen with calendar entries in the Calendar view.
Note 3: Make sure that your account should be a member of the Organization Administrator group.
Drawbacks of the Manual Procedure
The above manual methods will definitely take a lot of time and a confusing process. Many times user faces errors when importing a PST to Office 365 due to its difficult and lengthy and confusing steps. Therefore, getting errors in this procedure is very normal.
Opt Error-Free Solution
If you are looking for a fast and reliable tool that directly import OLM file to office 365 without any trouble, then choosing a third-party tool.
Few Possible Reasons to Import OLM File to Office 365
There are multiple reasons to convert OLM to Office 365, I am listing below some of them:
- Some Outlook for Mac users needs to move their email client application to cloud-based Office 365 because of its advanced functionality.
- Microsoft Office 365 operators can open their emails from any location or anywhere of the world widely, though it is not possible with Mac Outlook editions.
- MS Office 365 account can be easily opened by using an account using any system, it is not possible with Mac Outlook 2011 and Mac Outlook 2016.
- Online Office 365 comes with advanced-level security features and it is very little chance for virus attack because it is a cloud-based platform.
- Office 365 is capable of full fill all corporate requirements such as it is a combination of Emails, Contacts, Calendar, MS Word, MS Excel, MS PowerPoint, etc. with a cloud facility.
Conclusion:
In the above article, we discussed the necessity of conversion from OLM files to Office 365 and its different solutions. We discussed the manual solution but due to its drawbacks like loss of data, lengthy process and time-consuming process, it is recommended to use an advanced solution like OLM Converter tool.
